Fermented chicken feed… it can sound kind of scary at first. What is fermented feed? Is it easy to make? Will my chickens even eat fermented feed? Fermenting chicken feed is about the easiest natural concoction you can make for your flock! Not only does it provide countless benefits, but having your flock consume fermented feed also benefits you as the chicken keeper. With just a basic understanding of what fermented feed is, what it does, and how it works, you should be able to successfully ferment your flock’s feed on a regular basis.
Looking to get going ASAP? Our free step by step guide is printer friendly and will show you how to ferment your chicken feed in just a few days!

What is Fermenting?
Fermenting is the process of naturally gathering wild cultures and yeasts from the air and combining them with an organic substance (chicken feed). These wild yeasts and cultures then go about creating a metabolic process that causes chemical changes to occur to the chicken feed. Sugars and starches contained in the feed ingredients are broken down into lactic acid bacteria. During the fermentation process, these friendly bacteria proliferate and many beneficial changes are made to the food.
In order for this whole process to take place, a few key elements need to be present. Fermenting feed starts off much like you would soak seeds or grains to generate germination. The feed must be covered with water in order for the wild yeast to be captured and start growing. Wild yeasts are present in the air and can be present on the actual feed ingredients contained in the chicken feed. As the feed soaks in the water and wild yeasts are gathered, the fermentation process begins.
It usually takes about three days for the wild yeasts to proliferate and make enough changes to the feed ingredients to provide the amazing benefits of fermented feed. The fermentation process can take longer, however, the longer a food ferments, the more alcohol is produced through the fermentation process. You don’t want to put your chickens on high! Thus, the typical time span of fermenting chicken feed is typically between 3-4 days for a good batch of fermented chicken feed.
Nutritional Benefits of Fermented Feed
The presence of wild yeasts and cultures, along with the accumulation of beneficial bacterium and the changes made to the feed ingredients, all provide countless benefits for your flock! Here’s some of the main nutritional benefits you can expect:
- The lactic acid bacteria produced during fermentation promote the growth of beneficial microbes called probiotics. These improve the digestive system health and boost the immune system.
- The protein contained in the feed ingredients becomes more readily available for digestion.
- Phosphorus becomes more digestible which is essential for the proper utilization of calcium.
- Fermenting chicken feed naturally reduces its sugar content.
- The wild yeasts and cultures contained in fermented feed combat the presence of harmful mold spores in the feed.
- Enhances the overall nutritional value of the feed ingredients by breaking them down into simpler substances, generating the germination process, and making the nutrients more readily available for digestion.

Benefits to You and Your Flock
Along with the nutritional changes that occur to chicken feed when it is fermented, the fermentation process also provides many other practical benefits to the flock and to the backyard chicken keeper. We’ve already seen how fermenting changes the nutritional value of feed ingredients, but it also changes how the feed is utilized by the chicken’s body when it is digested. A few of the health-boosting benefits that fermented feed provide for the backyard flock include:
- Fermenting chicken feed makes the feed easier to digest, which improves the feed consumption to production ratio of your flock.
- Can increase the feed’s protein content, allowing your flock to get more beneficial protein without consuming more feed.
- The probiotics contained in fermented chicken feed promotes good gut health and beneficial microbes that help fight off disease causing microorganisms.
- Fermented feed can help hens lay bigger and better-quality eggs.
- The beneficial bacteria, yeasts, and probiotics in fermented feed help your flock build up a strong immune system for fighting off disease.
- When chickens consume fermented feed, more of the feed can be utilized for energy and nutrition, which decreases the amount of waste produced.
One of the best benefits that fermented chicken feed provides for the chicken keeper is the fact that it can help you save money on chicken feed! The fermentation process essentially doubles your feed content. If your flock consumes a pound of feed in a day, you would only have to ferment a half a pound of feed and your flock could still consume their normal amount of food for the day. Between the whole grains expanding when they are fermented and the increased nutritional value of fermented feed, chickens can consume less fermented feed and still receive the nutrients they need to stay healthy and productive. Also, since more of the nutrients in the feed are available for use by the body, there is less waste, which means less poop to deal with in the coop! Fermented feed can make chicken droppings drier, which makes them easier to clean up and decreases the amount of moisture produced by chicken poop. Drier poop makes for a healthier environment.
Since fermented feed is usually more appealing to chickens, there can be less feed waste as well. The damp fermented feed is less conducive to being “beaked out”, a behavior that chickens often do when eating dry feed from a feeder. Feed is saved when the chickens don’t ditch it out of the feeder!
How to Make Fermented Chicken Feed
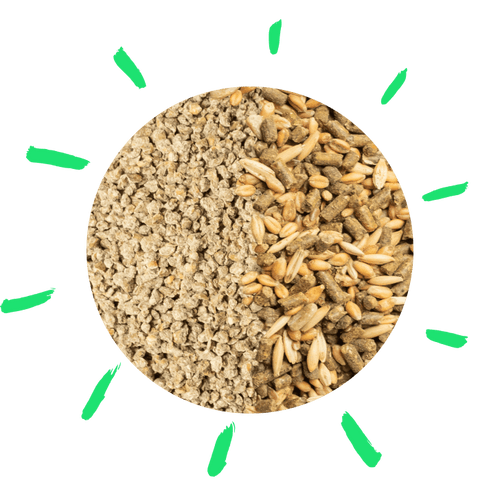
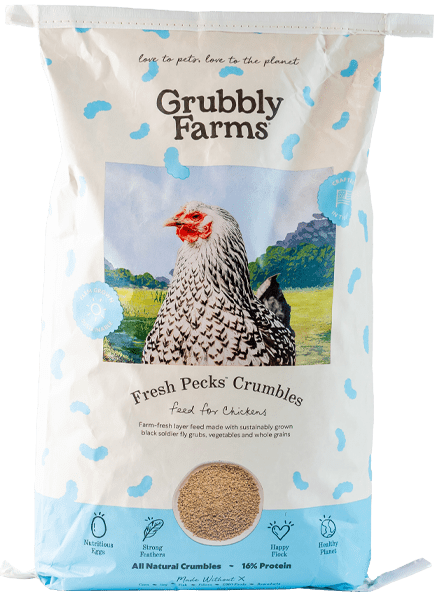
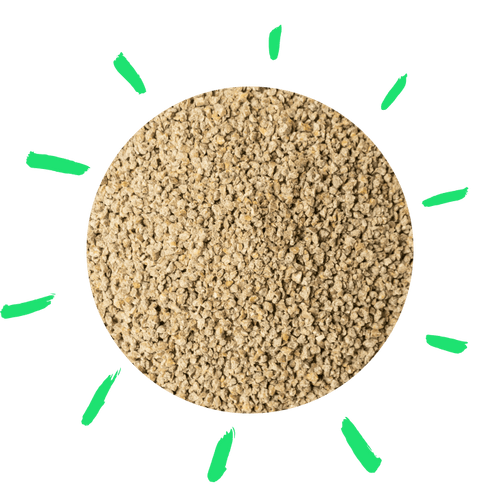
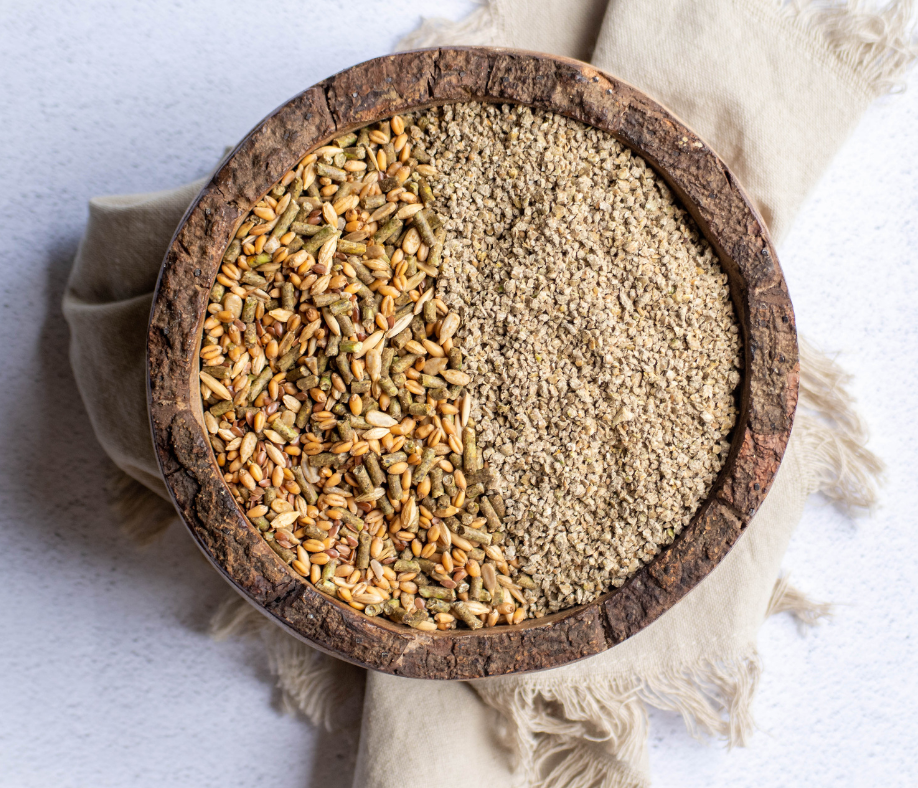
All those benefits sound great, so how do you get started? It’s easy! First, you need to choose the right feed to ferment. Chicken feeds that contain whole grains will ferment the easiest and provide the most benefits. Whole grains naturally contain some of the wild yeasts needed to kick start the fermentation process. Also, the less processed the grains are, the more they are naturally able to be broken down into beneficial substances. When using a whole grain feed, the grains in the feed will soak and start the germination process, which adds nutrition to the fermented feed too! An all-natural, whole grain-based layer feed, such as Grubbly Fresh Pecks Feed, is the best feed to ferment for your flock!
To start fermenting your flock’s chicken feed, you need to figure out how much feed you need. If you already know how much food you feed your flock on a daily basis, then simply cut that amount in half in order to know how much to ferment. If you are unsure how much your flock eats in one day, start off by roughly estimating that an average size backyard chicken (think Rhode Island Red or Plymouth Rock) will eat about ½ cup of feed per day. Figure out how many cups of feed your entire flock will eat (1/2 cup per bird) and then cut that amount in half, that’s how much feed you should ferment for one day’s worth of fermented feed for your flock. Now for the fermenting process!

Supplies:
- Chicken feed (half as much as your flock normally eats in one day)
- Large glass jar (large enough to hold double the amount of feed you’re fermenting)
- Slotted wooden spoon
- Cheesecloth
- Rubber band
- Cool, untreated water

Instructions:
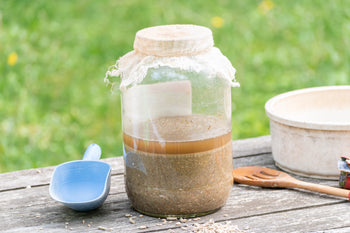
- Day 1, Morning: Measure out the feed into the large glass jar. Pour in enough water to cover the feed by 2 inches. Stir. Cover the jar by fastening a piece of cheesecloth with a rubber band over the mouth of the jar.
- Day 1, Afternoon: Check on the feed. More than likely all the water got absorbed. Add about 1 inch more of water. Stir.
- Day 1, Evening: Stir the feed. The water level should be just barely covering all the feed after you stir the feed. You may start to see a few bubbles after you stir it!
- Day 2: Stir the feed at least 3x today. A good stirring schedule is usually morning, afternoon, and evening. You may start seeing more bubbles after each time you stir the feed.
- Day 3: Stir the feed at least 3x today. You should start seeing bubbles after every stirring! The feed may also smell a little sour, a sure sign that fermentation is happening!
- Day 4, Morning: You can serve the fermented feed today!
You can tell when your fermented feed is done by watching for the formation of bubbles within the mixture. Bubbles are produced as the wild yeasts break down the feed ingredients and lactic acid bacteria are produced. You will see the most bubbles after you stir the feed each day. The feed may also smell sour and seem to be ‘living’ after every time you give it a stir. Lots of active bubbles means a good ferment!

On the beginning of the third day of fermentation, you may notice that the fermented feed seems to have ‘risen’ or absorbed more water. Don’t add additional water. Stir the fermented feed first and you will more than likely realize that the feed did indeed rise and that there is still plenty of moisture in the feed. This is normal fermented feed behavior, and it just means that the fermentation process is occurring and is strong!
Alternatively, sometime on the third day you may stir the fermented feed and notice that it appears ‘dead’, or that there are no bubbles and separation of the feed and the water is distinct. That’s okay, the beneficial bacteria in the fermented feed probably consumed all the available ‘food’. Stated otherwise, all the feed ingredients have been broken down and there is nothing left for the wild yeast to consume and chemically change. This means that you can either add more feed or serve the fermented feed to your flock.
As an extra bonus, be sure to download our printer-friendly, step by step guide to feed fermenting. Post it next to where you keep your feed for handy instructions!
Serving Fermented Feed
So now that your feed has completed a 3-to-4-day ferment, it’s time to dish up this delicacy to your flock! There are a couple of ways you can serve fermented chicken feed. The method that you choose will depend on how your flock likes their feed.
The first method involves using a slotted wooden spoon to strain out the feed. After the feed has fermented, you will use the spoon to strain out the feed into a serving bowl for your flock. Some liquid will remain with the soaked grains, but for the most part you will be serving your flock a bowl full of moist, soaked, and fermented chicken feed. If you choose this method, then you can either dump out the remaining liquid or save it to start a second batch of fermented feed. If you save the liquid and start a second batch of fermented feed, then the second batch will ferment faster and be a stronger ferment since some of the wild yeasts and cultures will already be present in the leftover liquid.
The second serving method involves dishing up the fermented as is. You can strain any extra water off the top and then serve up the fermented feed in a bowl for your flock to enjoy. The feed will be similar to an oatmeal-like consistency. This method works best if the fermented feed is already thick or contains a lot of small feed particles that would be hard to strain out.

As with introducing any new food, your flock may need little adjustment period to get used to eating fermented feed. Most chickens actually like moist feed better than dry feed, so fermented feed will be appealing to them. Sprinkling some Grubblies snacks on top of the feed provides a little supplemental protein and encourages your flock to dive in! If you are nervous that your flock won’t like fermented feed, then you may just try fermenting a small portion of feed. Once fermented, offer the feed to them as a treat rather than their daily portion of feed. If your flock devours the fermented feed, then you know you are safe to ferment their entire daily ration of feed!
If you are serving the fermented feed as a daily ration of feed, then you will want to remove their usual feed source for the day. Your flock can munch on the fermented feed throughout the day just like they would normally do with the dry feed. Any feed that is leftover at the end of the day should be tossed. Leftover fermented feed can easily attract unwanted organisms and molds very fast because the ingredients are already damp. If your flock leaves a lot of food in the dish at the end of the day, then you may consider cutting back on how much food you ferment. Fermented feed is more filling and less of it needs to be consumed than dry feed, so your flock may not eat as much as they normally do of dry feed. Adjust the amount as needed so that there is minimal leftovers and waste.
General Fermented Feed Tips
- Chicken feed that contains whole grains ferment the best and is the most nutritional.
- You may see a few bubbles as soon as 24 hours of soaking, however, don’t expect any major bubbles until the second day of fermenting.
- A sour, acidic, or slightly yeasty smell if perfectly normal for fermented feed.
- If the feed looks moldy, smells moldy, or is otherwise contaminated, don’t serve it to your flock!
- Try to use glass, wood, or plastic containers and utensils when dealing with fermented feed. Metal objects can sometimes hamper with the fermentation process.
- Always ensure all of the feed is below the water level. If left dry and exposed to the open air, mold spores can collect on the moist feed and cause it to mold.
- However, don’t drown your fermented feed in water! While you can’t have ‘too much water’, you should strive for a balance of enough water to cover the feed but not having too much excess water sitting above the feed. It should be a thick, soupy consistency.
- Having excess water above the feed can hamper your ability to see bubbles or notice any strong signs of the fermenting process.
- Use cheesecloth or a porous material to cover the fermented feed jar with. You want the small wild yeast particles to be able to be collected but you also want to keep large debris particles out of the feed.
- The best place to store your fermented feed while it’s fermenting is in a location that is protected, dark, and somewhat cool. It should be easy to access but not in a high traffic location. A pantry often works well.
- If you are done fermenting feed for a few days, clean out the fermented feed jar with a splash of vinegar and some warm water.
- If you are serving the fermented feed using the straining method, you can strain the feed the night prior to the day you want to serve the feed. Just cover it with an airtight lid and keep it stored in a cool location until you serve it in the morning.
Tips for Fermenting Grubbly Fresh Pecks Feed
- After 24 hours of fermenting, the pellets in the feed will break down and become like mush.
- Bubbles will not form on the top of the fermented feed, instead, you will see more bubbles after every time you stir the feed. You may also see air pockets or bubbles within the fermented feed.
- The fermented feed consistency should be a like a thick, wet mash.
- The feed will go through the characteristic ‘rising’ stage, but it will also have periods where the feed and water are in distinct layers. Giving the feed a good stir helps fix both of those situations.
- Fermented Grubbly Fresh Pecks feed will be hard to strain. Instead, pour off any excess water on the top and serve the feed as a thick mash to your flock!
Fitting Fermented Feed into Your Schedule
Fermenting chicken feed can sound like quite an undertaking. Candidly, it is something you will have to make time for in your daily chicken keeping routine. However, it doesn’t have to be all consuming. Once you get the hang of fermenting chicken feed, it will be a breeze to whip a batch or two each week for your flock.
First you need to decide committed you are to the fermenting process. You can use it simply as a tasty, healthy treat for your flock, you can make it strictly their diet for the entire day, or you can do a combination. If you want fermented feed to help you save money on chicken feed, then consider feeding your flock just fermented feed for 2-3 days out of the week. Alternatively, you can set up a fermented feed system where you have a batch ready every day so that your flock can eat fermented feed all week long.
Here is a sample schedule for feeding your flock fermented feed twice a week:
- Sunday: Start a batch of fermented feed in the morning
- Monday: Stir the feed in the morning, afternoon, and evening
- Tuesday: Stir the feed in the morning and afternoon, you can strain the feed in the evening and save it to serve to your flock on Wednesday morning
- Wednesday: Serve the first batch of fermented feed and start a second batch of feed in the morning
- Thursday: Stir the feed in the morning, afternoon, and evening
- Friday: Stir the feed in the morning and afternoon, you can strain the feed in the evening and save it to serve to your flock on Saturday morning
- Saturday: Serve the fermented feed, wash the fermented feed contain so that it is all set to start the process again on Sunday
Of course, you can do your own version of this schedule and even stagger batches so that you have fermented feed ready every day to give to your flock. The main takeaway is that fermenting chicken feed can easily be fit into your schedule to benefit both you and your flock!

Fermented Feed for Happy Hens!
Learning how to ferment your flock’s food can benefit both you and your chickens. The beneficial probiotics and bacteria in fermented feed boost gut health and improve the immune system. When fermented, the nutrients in chicken feed become more readily digestible, which makes it all the more beneficial for your chickens! It can help you save on chicken feed costs, cut back on droppings to clean up in the coop, and makes for healthier, more productive hens. Fermented chicken feed makes for happy hens and happy chicken keepers!