Hatching chicks at home can be a fun and highly rewarding experience! Mother hen usually knows what is best when it comes to hatching chicks, but you can still hatch a successful brood when you mimic the incubating environment that a mother hen would provide. There are some essential supplies and the proper techniques for incubating eggs we’ll review in the article to come. This complete guide to hatching chicks will walk you through everything you need to know about incubating eggs and hatching chicks at home!
What do you need for hatching chicks at home?
To hatch chicks at home, there are some essential supplies you will need to invest in. Here is a list of incubating supplies to purchase when you plan on hatching chicks:
- Incubator - provides the correct environment for fertile eggs to develop.
- Chick Hatcher (optional) - often used during the last 3 days of incubation for when the chicks hatch.
- Candling Light - a bright light that can penetrate through the eggshell color for candling the eggs.
- Distilled Water - used to maintain humidity in your incubator.
- Hydrometer - a small, digital hydrometer can help you monitor humidity levels in the incubator, versions that have a probe that fits into the incubator ventilation holes are especially helpful.
- Soft Lead Pencil - use a soft lead pencil when marking your hatching eggs so you don’t accidentally puncture the shell.
- Egg Scale (optional) - an egg scale is used for monitoring egg weight loss which can help you get the correct humidity levels during incubation (eggs lose weight as moisture evaporates during incubation).
- Shelf Liner - can be used to create a non-slip surface on the bottom of the incubator during hatch time.
- Brooder - a brooder should be prepared before your chicks hatch.
Choosing an Incubator

When choosing an incubator to invest in, there are several factors you’ll want to consider. First, decide how many eggs you will want to incubate. Incubator sizes range from small table-top models that hold a dozen eggs to large cabinet style incubators that can hold several dozen eggs. You should also consider if you want to get a forced air incubator or a still air incubator.
A forced air incubator has a fan installed in it to circulate the air during incubation. The circulating air helps keep the temperature even throughout the whole incubator. A still air incubator lacks a fan, relying on passive warm air rising from the bottom to the top of the incubator, eventually escaping out of the ventilation holes. Do your own research here, but both versions of incubators can be used to successfully hatch chicks.
You should consider these larger factors when choosing an incubator to invest in:
- Turning - does the incubator have an automatic turning system or will you need to turn the eggs manually
- Temperature Control - is the temperature controlled mechanically or electronically
- Humidity Control - is the humidity controlled automatically or do you need to manually monitor the humidity levels
- Ease of Observation - can you easily see the eggs while they are incubating
- Ease of Cleaning - can the incubator be easily cleaned after each batch of eggs
- Price - does the price fit your budget
No matter what incubator you choose, you should always read its instruction manual so you can get a better understanding of how your make and model operates.
How to Prepare an Incubating Room
Once you have all your incubating supplies, it's time to set up an incubating area. You may already have an area in mind or still remain undecided. Before settling on a space, consider the following traits for an ideal incubation room/area:
- Easy to Remember - you will need to fill the incubator’s water reservoir throughout incubation to help maintain proper humidity.
- Out of the Way - the incubator should not be in a spot where it will get knocked, bumped, or unplugged during incubation.
- No Drafts - avoid doorways, hallways, or high-traffic areas where constant air flow could cause drafts which will affect the incubator’s ability to maintain a correct temperature.
- Avoid Direct Sunlight - keep the incubator away from windows where direct sunlight could heat up the incubator or windy drafts could cool it down.
- Constant Environment - choose an area that maintains fairly stable temperature and humidity levels throughout the day and night.
- Temperature - most incubators function best in an environment between 60-70°F.
Start by Cleaning your Incubator
After you have chosen a spot for the incubator, you will now need to prepare the incubator. Even if your incubator is brand new, straight out of the box, it is still a good idea to sanitize the incubator before using it to hatch eggs. You will want to wash any waterproof parts in warm water with a splash of white vinegar. Use a damp towel to wipe down any parts of the incubator that can’t be submerged in water. Let the incubator air dry completely.
Perform a Test Run
Once the incubator has been cleaned and re-assembled, you will need to test run the incubator for at least 24 hours before you plan to add your eggs. A test run will ensure that your incubator can maintain the proper incubating conditions over a full day. Always follow the manufacturer's instructions for programming your incubator.
Here are some general guidelines to follow when programming an incubator:
- Temperature: 99.5°F (forced air), 102°F (still air).
- Humidity: 56-60% (forced air), 58-61% (still air).
- Turning: every 1-2 hours, able to turn ‘automatic turning’ on or off.
- Turn Angle: dependent on the size of the eggs you are incubating, eggs should never be turned in a complete 180° rotation.
- High & Low Temperature Alarms: 1.5-2° differences.
Some incubators may have many or few features to program. Read through the instruction manual to learn how to best program your model. If your incubator does not have an automatic turning system, you will need to turn the eggs yourself.
How to Candle Hatching Eggs

Learning how to candle eggs is an essential part of incubating. Candling eggs involves using a bright light to illuminate the interior of the egg, giving you the opportunity to monitor the embryo as it develops throughout incubation.
You will be candling the eggs three times total throughout the incubation process. Each candling session will be performed the same way, but you will be looking for different things each time you candle the eggs.
To candle eggs, you will need a candling light and a dark room. A bright flashlight often works well as a candling light, or you can invest in professional candling devices. Eggs with dark colored shells will be harder to see into since the light will have a harder time penetrating the dark colored shell.
Hold an egg above the bright light with the blunt end of the egg closest to the light. Don’t hold the blunt end of the egg directly over the light, but instead at an angle with the blunt end higher than the pointy-er side. The air cell is located at the blunt end of the egg, holding that directly under the light will block the light from illuminating the rest of the egg. You should be able to see the air cell at the blunt end of the egg and a dark, shadowy circle near the center of the egg, which would be the egg yolk. The egg yolk is also where you will start to see embryo development as the egg incubates.
At any point while candling, you will need to be able to set examined eggs in a safe spot while you move to the next one. A clean egg carton or a shallow basket lined with a soft towel can work well for preventing the eggs from rolling all over the place as you candle them. When candling the eggs during the incubation process, you will want to work quickly but carefully. The longer the eggs are out of the incubator and exposed to cooler air, the more the development process is delayed.
Once all of the eggs are candled, you will want to quickly and carefully place them back in the incubator and close the lid. Make sure the incubator returns to a stable temperature and humidity after opening and closing it to candle the eggs. Each candling time is also a good time to refill the incubator’s water reservoir if needed to help the incubator maintain the proper humidity levels needed for incubating.
How to Incubate Chicken Eggs
Now comes the fun part, putting those eggs in the incubator! However, there are a few important steps you should take when preparing the eggs for incubation.
First, you will want to candle all the eggs and mark them for identification. Marking each egg for identification will help you keep track of which eggs are developing throughout the incubation process. You may also choose to outline the air cell to help keep track of humidity levels. As an egg incubates, the air cell will gradually increase in size if the humidity levels are correct and enough moisture is evaporating from the egg. Weighing the eggs and keeping track of each egg’s weight loss can also help you monitor the humidity levels throughout incubation.
When candling the eggs prior to setting them in the incubator, look for these things:
- hairline cracks in the eggshell
- splotchy shells
- double yolks
- blood spots (usually seen as a dark spot inside the egg)
- misplaced air cells (the air cell should be located at the blunt end of the egg)
Eggs with hairline cracks, splotchy shells, double yolks, or blood spots should not be incubated as they will more than likely not fully develop and could even rot in the incubator. Eggs with misplaced air cells can still be incubated, however, those eggs are less likely to hatch properly.
Marking your Eggs
If you are turning the eggs manually, it is a good idea to mark one side of each egg with an X and the other side of each egg with an O. This can help you keep track of how much you rotate the eggs during each turning. You never want to rotate the egg in a complete circle, which can break the chalazae which holds the yolk in place within the egg.
Place Your Eggs in the Incubator
Once the eggs are candled and marked, you can set them in the incubator. If you properly tested your incubator for 24 hours, it should be at the proper temperature and humidity levels. Open the incubator and place the eggs in the incubator. Different models of incubators will have the eggs positioned in different ways. No matter the incubator, always make sure the pointy end of the egg rests slightly lower than the blunt end of the egg. If the eggs are placed on their sides, the pointy end will naturally rest lower than the blunt end. Close the incubator once all the eggs have been set. Over the next 30 minutes, monitor the incubator to make sure it returns to the proper temperature and humidity levels.
How Often to Turn Eggs
Also make sure that all the eggs turn properly when they are turned for the first time. If you manually turn your eggs, you will want to do so three to five times a day for the first two weeks of incubation. Make sure you set a reminder to turn those eggs! For the last week of incubation, turning the eggs frequently is not as important, but it should still be done at least twice a day.
Humidity
It is important that the incubator maintains a stable humidity level throughout incubation. If the humidity gets too low, too much moisture will evaporate from the eggs causing the embryo to get stuck inside of the shell. If the humidity gets too high, not enough moisture will evaporate from the eggs and the embryo will develop too fast to mature properly. Use a hydrometer to test the humidity in your incubator frequently. Most incubators have a water reservoir that you need to fill in order for correct humidity levels to be maintained. You will need to refill the water reservoir as needed throughout incubation as water evaporates from the reservoir.
Here are some tips for further adjusting the humidity in the incubator:
- Increase or decrease the water surface area of the water reservoir to increase or decrease humidity levels.
- Open or close some of the ventilation vents on the incubator to increase or decrease humidity.
- Use warm water to increase the humidity levels.
- Moist sponges or small towels can also help increase humidity levels.
- Keep the humidity levels moderate in the incubating room.
After you set the eggs, don’t open the incubator unless you are manually turning the eggs or need to refill the water reservoir. The fewer times you open the incubator, the more stable the incubator can keep the temperature and humidity and the better hatch rate you will get.
Candling your Eggs: Round 2

The next time you will be candling the eggs will be after seven or ten days of incubation. Some folks choose to candle on day seven, which is exactly one week into the incubation period. Others prefer to wait until day ten, which is about halfway through the incubation period.
When you are ready to candle the eggs on day seven or ten, prepare a secure place to set the eggs while you candle them all. Quickly but carefully remove them all from the incubator and close the incubator. Candle the eggs and discard any eggs that show no signs of development. Here is what to look for when candling eggs at day seven or ten:
- Web of blood vessels around dark spot on the yolk - that means an embryo is developing.
- Clear - if the egg looks the same as when you set it, it was not fertile and is not developing.
- Blood ring - a blood ring will look like a narrow red ring within the egg and it means the embryo has died and is not developing.
- Cloudy shadows - cloudy shadows that swirl within the egg also indicate that the embryo has died and will not continue developing.
After candling all the eggs, quickly and carefully place them back in the incubator. Make sure the incubator returns to the proper temperature and humidity levels and that all the eggs turn properly after being placed back in the incubator. Don’t place eggs back in the incubator that are not developing. The non-developing eggs can rot and potentially explode, contaminating all the eggs in your incubator and ruining your hatch.
Time for Lockdown
Lockdown is the term used to refer to the last three days of the incubation period. Chicken eggs have a 21-day incubation period, so days 18-21 are considered lockdown time. Lockdown is when you candle the eggs for the last time and prepare the incubator for when the eggs hatch.
After 18 days of incubation, carefully remove all the eggs from the incubator and candle each egg. Keep an eye out for the following signs:
- embryo fills most of the egg.
- may see some blood vessels around the embryo, especially close to the air cell.
- dark shadow in the air cell (that means the embryo has internally pipped).
- signs of no development- murky or muddled contents, blood ring.
If you are unsure if an egg is developing or not at this stage of incubation, it is safe to keep it in the incubator just to see if it will hatch. If the contents of an egg are clearly not developing or are loose and swirly, the egg will not hatch and should not be put back in the incubator.
Before you place the eggs back in the incubator, you will want to lay down a piece of plastic shelf liner on the floor of the incubator. The shelf liner will provide a non-slip surface for the new hatchlings to stand on, helping to prevent leg issues such as splay leg. Putting the shelf liner on the floor of the incubator may mean that you need to remove the automatic turning system from the incubator. The eggs should not be turned after day 18 of incubation since the chick will now be moving into the proper hatching position.
If you are using a chick hatcher, now will be the time you transfer the eggs to the hatcher. The hatcher should be programmed for proper hatching conditions and prepared the same way you would with an incubator.
Adjust your Humidity During Lockdown
Once the shelf liner is in place, you can set all the eggs back in the incubator or hatcher. You will also want to increase the humidity levels in the incubator at lockdown time. For the final three days of incubation, the humidity level should be raised 8-10% higher than what it was during incubation. Higher humidity during the hatching time will prevent the shell membrane from drying out and trapping the chick inside the egg.
However, you don’t want the humidity to get too high since that will inhibit the hatchlings from fluffing out properly. If the hatchlings don’t fluff out fast enough, they could get chilled and die. As the chicks hatch, they will contribute added moisture and humidity within the incubator as well.
After you have candled the eggs, installed shelf liner on the floor of the incubator, stopped automatic turning, and increased the humidity, it’s time to shut the incubator lid and leave it closed until hatch time! Do not disturb the eggs after lockdown and avoid opening the incubator at all costs.
What to do on Hatch Day

The last three days of incubation are the most nerve-wracking as you wait for the eggs to hatch! In a normal hatch, all the eggs should hatch within 24 hours of each other. However, not all the eggs will hatch at the exact same time. Smaller eggs will hatch sooner than larger eggs and the rate of development of the embryo will dictate when each egg hatches.
Watch for Pips
The first sign to look for when waiting for the eggs to hatch is to watch for external pips on the eggshells. You may have seen eggs with internal pips when you candled them at lockdown, and if you didn’t, don’t sweat it! An internal pip just means that the chick has broken into the air cell of the egg, which is the first step in the hatching process. Once the chick starts to use up the oxygen in the air cell, it will make an external pip in the eggshell (typically towards the blunt end of each egg).
When you see the first pip in an egg, you will want to decrease the incubator temperature by .5-1°F. Breaking through the eggshell and hatching is hot work for a young chick. Decreasing the incubator temperature slightly will prevent the chicks from overheating as they hatch.
After a chick has pipped the eggshell, it will take a long break. Breaking through the eggshell with its egg tooth (located at the very tip of a young chick’s beak) is very hard work and the chick needs a break before it moves onto the next step of hatching. After the chick has rested, it will start to unzip the rest of the eggshell.
Unzipping from the Egg
Unzipping requires that the chick rotates around in the egg and breaks the eggshell so that it can free itself from the egg. Once unzipped, the chick will struggle and kick to come completely free itself of the eggshell. As hard as this struggle can be to watch, don’t help the chick! It needs to build up its muscles so that it can walk and grow properly.
The two best pieces of advice during this stage: don’t help a chick hatch from its egg and don’t open the incubator if chicks are hatching or there are pips in unhatched eggs. The proper humidity and temperature are crucial for the chicks to hatch properly. If the humidity gets too low, then the shell membrane that is exposed around the pip will dry out and trap the chick inside the egg. A healthy chick will not need help hatching.
Helping a chick hatch can be dangerous. Even after a chick pips the eggshell, its abdomen is still fully enclosing the egg yolk. If you go to help a chick out before it is ready to hatch, it could bleed to death.
After a chick has kicked free of its egg, it will stumble around the incubator and cause general havoc. Don’t worry, all that movement, jostling, and cheeping encourages the other chicks to hurry up and hatch. Chicks who have just hatched need to stay in the warm incubator while they fluff out.
Don’t Remove Until Fluffed Out
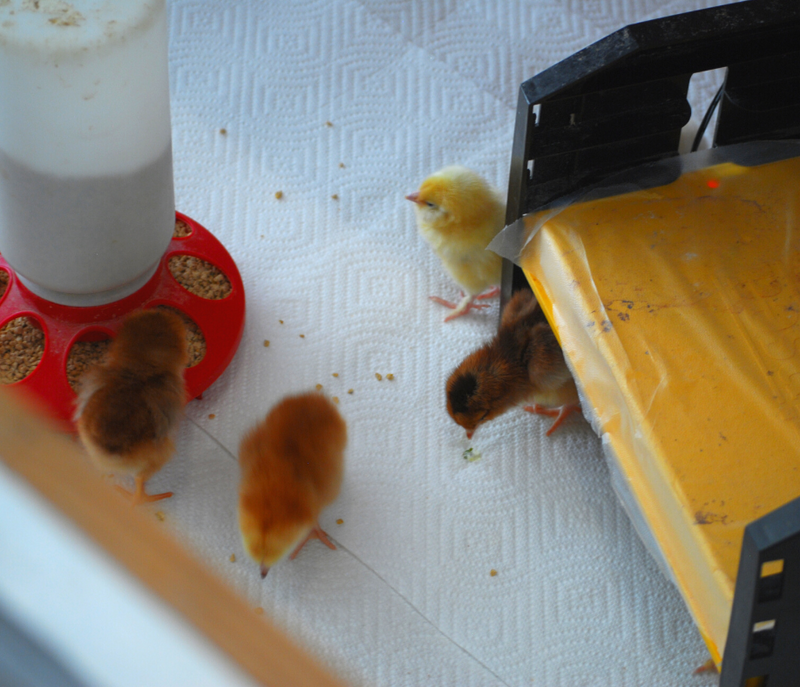
When a chick is fluffed out, that means its down feathers have dried after hatching and it looks fluffy and soft. Chicks should not be removed from the incubator until they are fluffed out and all the eggs have hatched. Once all chicks have hatched and fluffed out, you can open the incubator and move the chicks to a brooder! The brooder should be prepared with heat, food, and water.
If you are experiencing a draggy hatch where all the eggs don’t hatch within 24 hours of each other, you may consider removing chicks who have fluffed out so that they can start eating and drinking in the brooder. However, chicks can survive on the absorbed egg yolk for up to 48 hours, so don’t rush with removing the chicks from the incubator if you don’t have to.
What to do if an egg doesn’t hatch after 24 days?
For eggs that haven’t pipped or hatched, you can wait two or three more days after hatch day to see if they will be late hatchers. If an egg is going on 24 days of incubation with no signs of pipping or hatching, then it more than likely is not going to hatch. It may be an egg that you kept in the clutch after the lockdown candling because you weren’t sure if the embryo was developing or not. Or it could be an egg that had a fully developed embryo that was never able to hatch.
At this point, you can remove the eggs that didn’t hatch from the incubator and candle them. Look to see if the embryo fills the entire egg, which means it was fully developed, or for movement. If you see movement, you will want to continue to let the egg incubate. If you see an internal pip but no movement, more than likely the embryo died before it finished hatching.
You will want to discard any eggs that never hatched, or you can dissect the eggs to try and determine why they didn’t hatch. A few scenarios that might cause a chick not to hatch include:
- Humidity was too high
- It got trapped in the shell because humidity was too low
- Insufficient ventilation during incubation
- Insufficient or improper turning
- Breeder flock dietary deficiencies
- Incubator contamination
- Lethal genes
- Improper storage of the hatching eggs prior to incubating
- Eggs got chilled too long during incubation
- Improper positioning for hatching
- Poor eggshell quality
How to Clean an Incubator
Once you have moved all the chicks who hatched to the brooder and discarded any unhatched eggs, you will need to clean the incubator. Cleaning the incubator after each hatch is essential to prevent bacteria from building up in the incubator and ruining future hatches. Disassemble the incubator as much as you can and remove any broken eggshells, small eggshell pieces, the dirty shelf liner, and as much fluffy down as possible.
Wash any waterproof pieces of the incubator in warm water with a splash of white vinegar. Use a warm damp cloth to wipe down any parts of the incubator that can’t be fully submerged in water. Let the incubator air dry completely before reassembling the incubator.
When storing your incubator for prolonged periods of time, it can be helpful to fill a small sack of cheesecloth with some baking soda and place it inside the incubator. The baking soda can help absorb any moisture during storage. When you are ready to incubate again, your incubator will be all clean and ready for use!
Our last tip, always remember to congratulate yourself on helping bring new life into the world. While incubating your own eggs isn’t rocket science, you gave a lot of time, effort, and care into your new chicks.
Your work isn’t over though! Consider reading our guide to raising chicks to pick up where this guide left off!
Conclusion:

Watching a baby chick hatching from an egg is an amazing experience for chicken raisers of all ages! Incubating hatching eggs does take some time and patience, but the reward is worth it when you have a brooder full of fluffy chicks. Knowing how to properly set up your incubator, candle hatching eggs, set hatching eggs, and put your incubator in lockdown are all essential skills for incubating eggs. When it comes hatch time, be patient and let the chicks do what nature intended for them to do. Soon you will be able to hold a baby chick in your hands that is just hours old!